Materials required.
- A3 craft foam (the brand I used was called fun foam and you can get it from Jarrolds)
- Cardstock (200-220gsm, make sure it's not glossy)
- Hot glue
- Hot glue gun
- Acrylic paint (I used a brand called Plastikote, their basic white matt primer and a tub of Sunshine Yellow)
- Paint brush
- Pencil
- Ruler
- Craft knife/ scissors
- Velcro
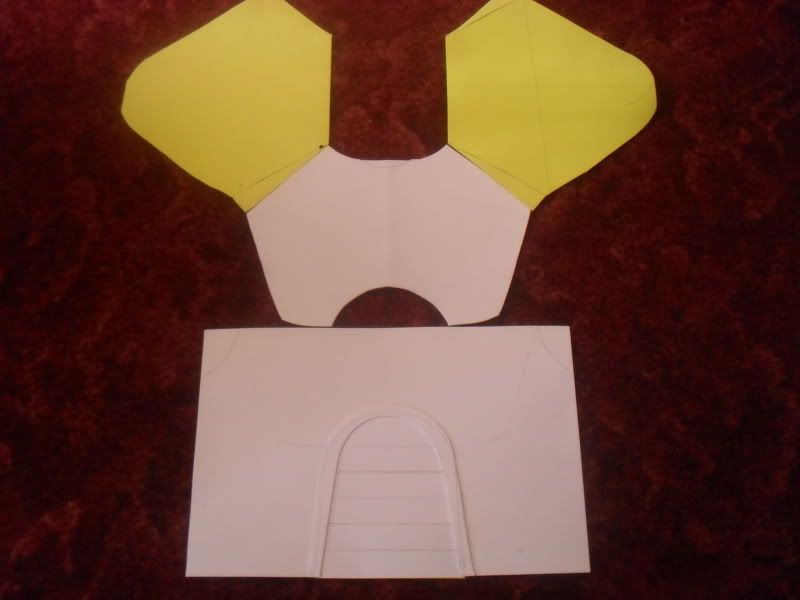
OK, first we need to make the basic shape! Start with the chest piece. There is no pre-drawn pattern for this. I made mine by placing the pieces of cardstock against myself, making rough pencil marks, placing it against myself again and making any neccessary adjustments. The bottom half was simply two pieces of craft foam placed together, side by side. DO NOT PLACE ANY OF THE ARMOUR'S "LINING" ON YET OR GLUE ANYTHING!
Things should look like this:
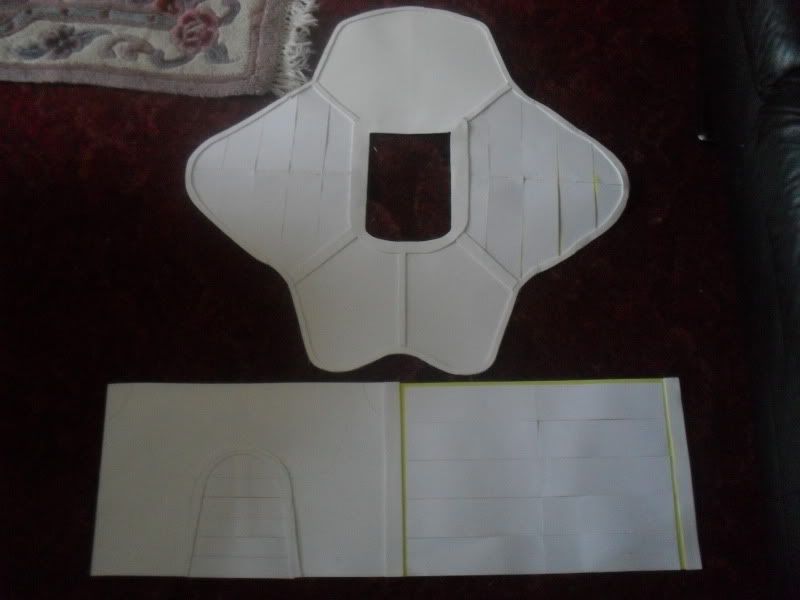
Make sure everything fits, then glue the armour's "wings" to the fornt chest plate and back plate. The chest and stomcahe plates should be seperate at this point. Now cut your cardstock into strips and place these over the areas on the armour where the yellow ridges are. When you're happy with them, glue them on, then cut out the armour's lining from your remaining cardstock and glue the libing on on top.
Things should look like this:
Now you wanna glue the chest plate to the wrap-around stomcahe plate, and the back of the chest plate to the back of the stomcahe plate but ensure only one side of the armour is glued together, because you need a strip of velcro there to make it possible to get in and out of the armour later on. (I hope that makes sense)
Things should look like this:

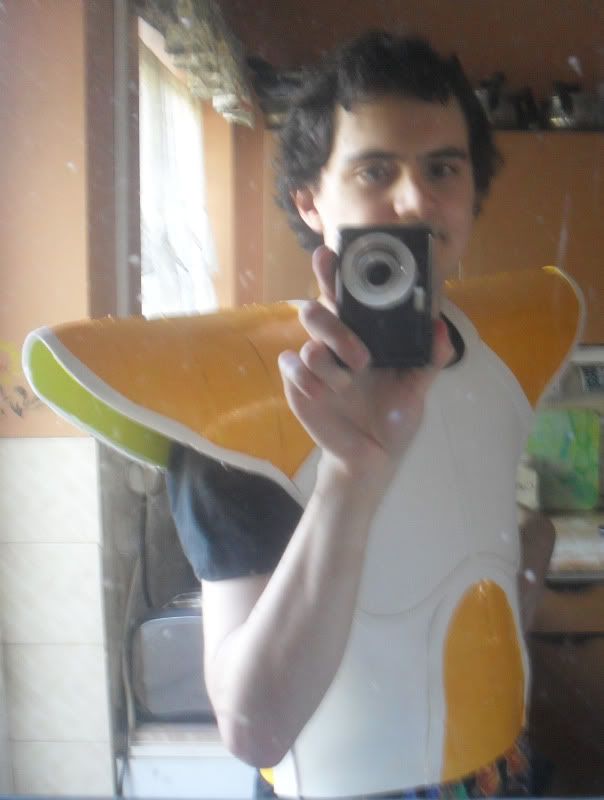
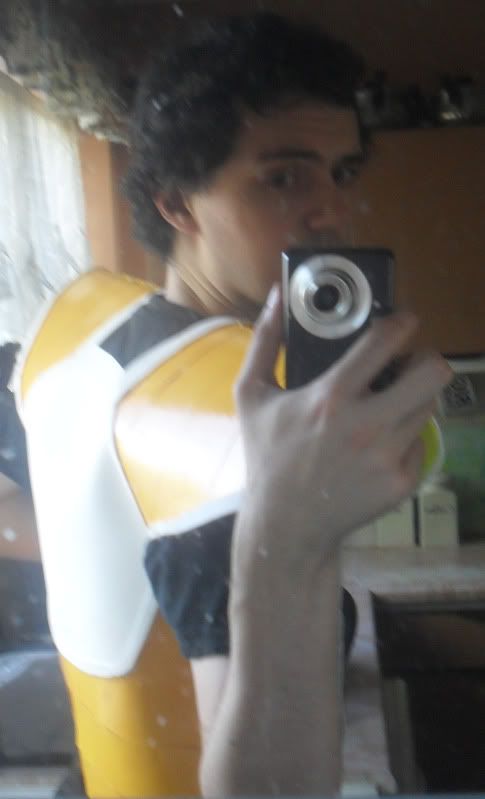
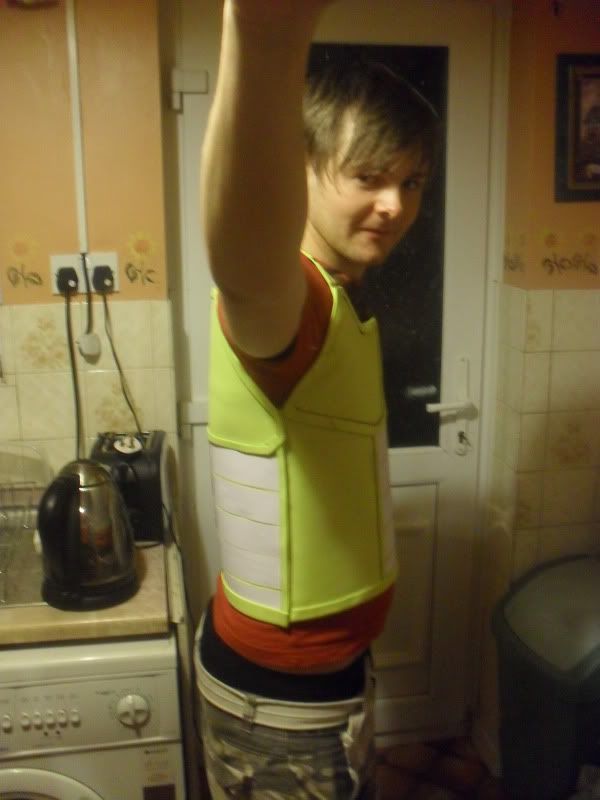
Now to painting. You'll want two to three thin coats of white primer, allow that to dry and paint the yellow onto the ridged areas.
Things should look like this:
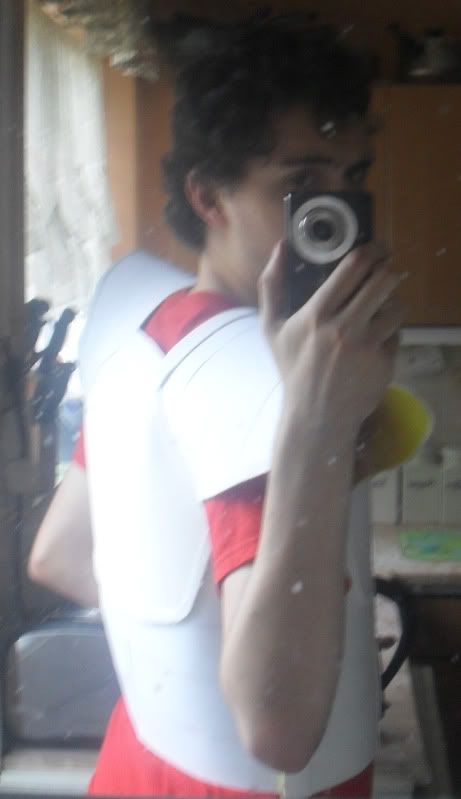
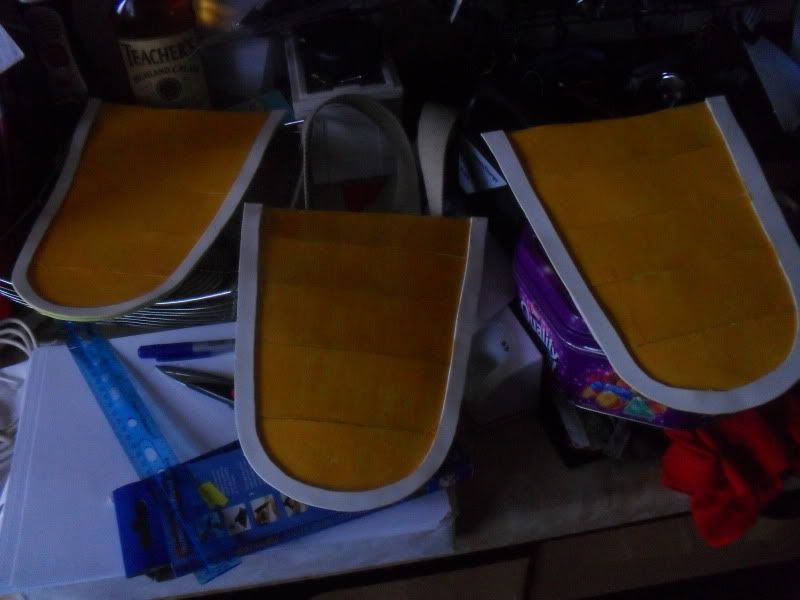
OK, now you need to glue a strip of velcro down the side of the armour where the opening is, so you can open the armour, then close it around yourself. Make it as discreet as possible! From here I made the three crotch plates.
Things should look like this:
Now glue the front crotch plate onto the armour and the side one which isn't on the side where the opening is. The one that is on the side where the opening is will need to be half glued, half velcroed so you can still get in and out of the armour. To finish up I bought two Saiyan tails from the Dragon Ball Neo range, about 30cm each, unscrewed the brown plastic buckle they're intially attached to, and glued them both noto the armour for the final result.
Things should look like this:


Congratulations! You've made your own Saiyan armour!
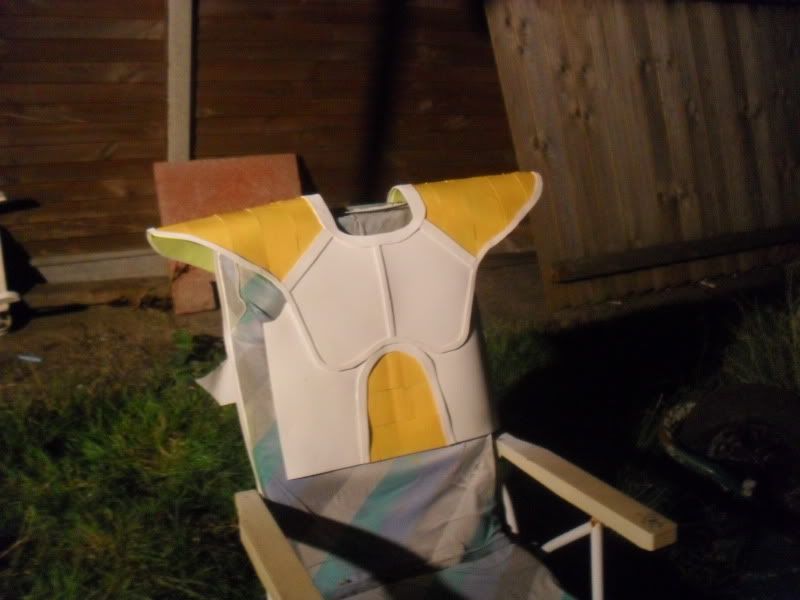
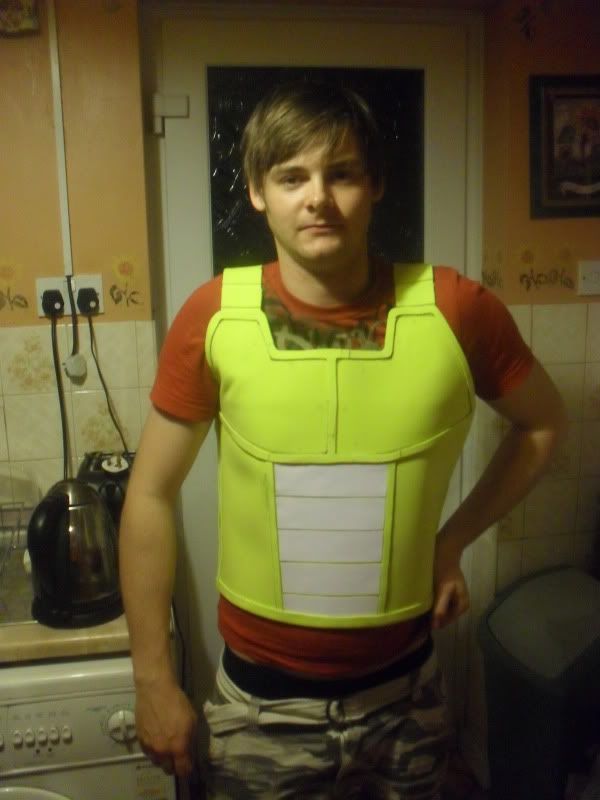
These techniques can be adapted to make any variant of the Saiyan armour. My friend wanted to cosplay as Android Saga Vegeta, and in less than four hours, we made this:

Enjoy!